Wednesday, April 29, 2020

Broken computer means bread!

To cope with the frustration of my stupid work computer being entirely unable to connect to the network, I took out my frustrations on bread and meatballs.
Turkey meatballs were: https://www.inspiredtaste.net/20529/turkey-meatballs-recipe-with-light-tomato-sauce/
The store was out of parsley so we left that out and we forgot about the basil.  I endorse including them.  the meatballs were a bit bland.   This was however a great recipe to include the children.  Alex made the meatballs and Elizabeth made the sauce.

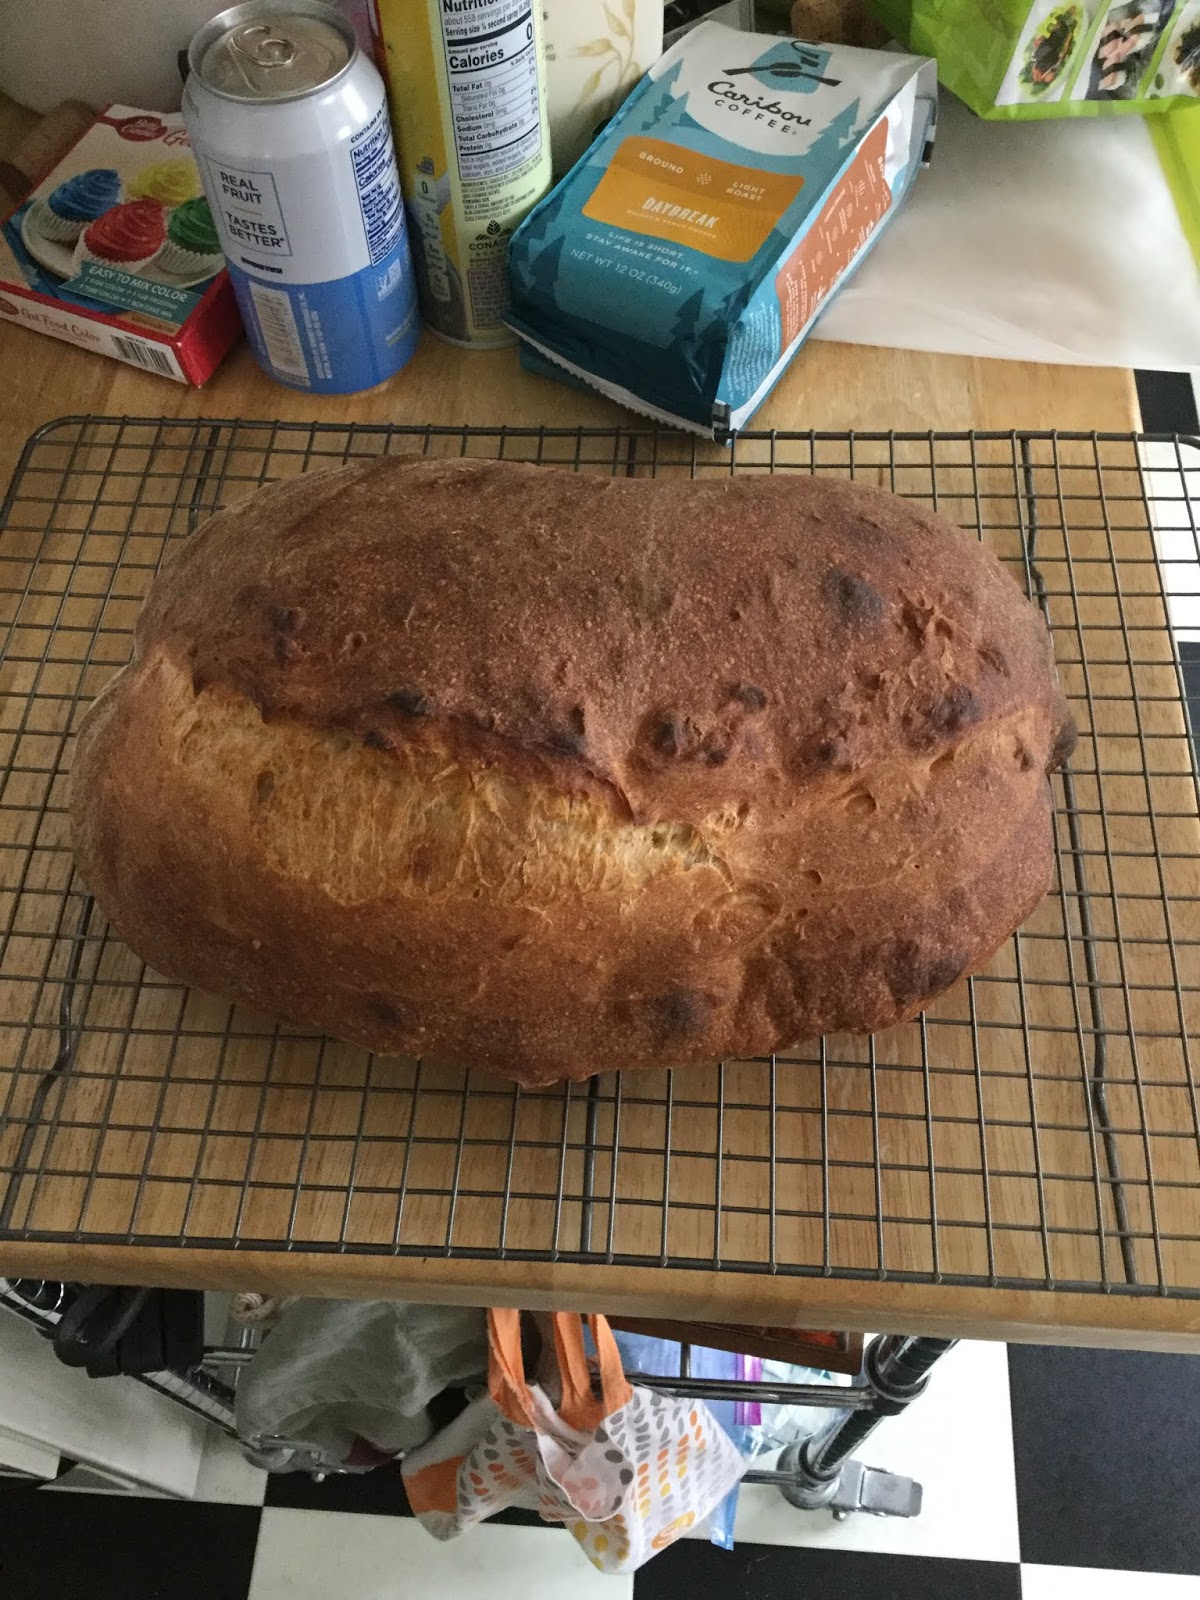
I also made focaccia bread using this recipe: https://www.bonappetit.com/recipe/focaccia-bread  I sauteed some leeks and cherry tomatoes that were far past their prime (think almost dried) and put them on half.  I did this before I poked my fingers through the dough.

it says it's supposed to be a thick batter.  Mine was more of a sticky dough in the mixer.


Overhead shot


It was supposed to have an 8-24 hour time out in the fridge.  Mine was only in there for about 4 hours and it was TASTY!

Before baking: 

Final product:


As dinner:


My notes:
Before you bake it, lift up the dough and put more olive oil under - mine stuck to the pan even though I had what I thought was a ridiculous amount of oil.
If you are going to top only half, use two pans - the topped side could have used just a few more minutes of baking time.
It also was on the short end of the baking time to get that lovely color.

Monday, April 20, 2020

Two bakers. Two lemon cookie recipes. Who will win?

I mentioned to the kids that we were running out of cookies and that we had lemons so we should make a lemon cookie.  They found two recipes and couldn't agree so they asked if they could each make one and see who's is better. 
Alex selected a lemon crinkle cookie: https://laurenslatest.com/lemon-crinkle-cookies/


Elizabeth selected a glazed lemon cookie: https://www.twopeasandtheirpod.com/glazed-lemon-cookies/


Interestingly these remind me of the lemon girl scout cookies - savannah smiles for Alex and Lemon-up for Elizabeth.
Lemon Crinkle Cookies:


Lemon Glazed cookies:


The lemon glazed cookies had most of the lemon flavor in the glaze. They are a more cake like texture - soft and crumbly.
The lemon crinkle cookies are chewier with crisp edges.  The lemon flavor was throughout the cookie. 
Patrick liked the glazed cookies and I liked the crinkle cookies best.  Tie game!  Everyone wins!

Sunday, March 29, 2020

Italian Week

By coincidence, a lot of the recipes we've been cooking this week have been Italian.

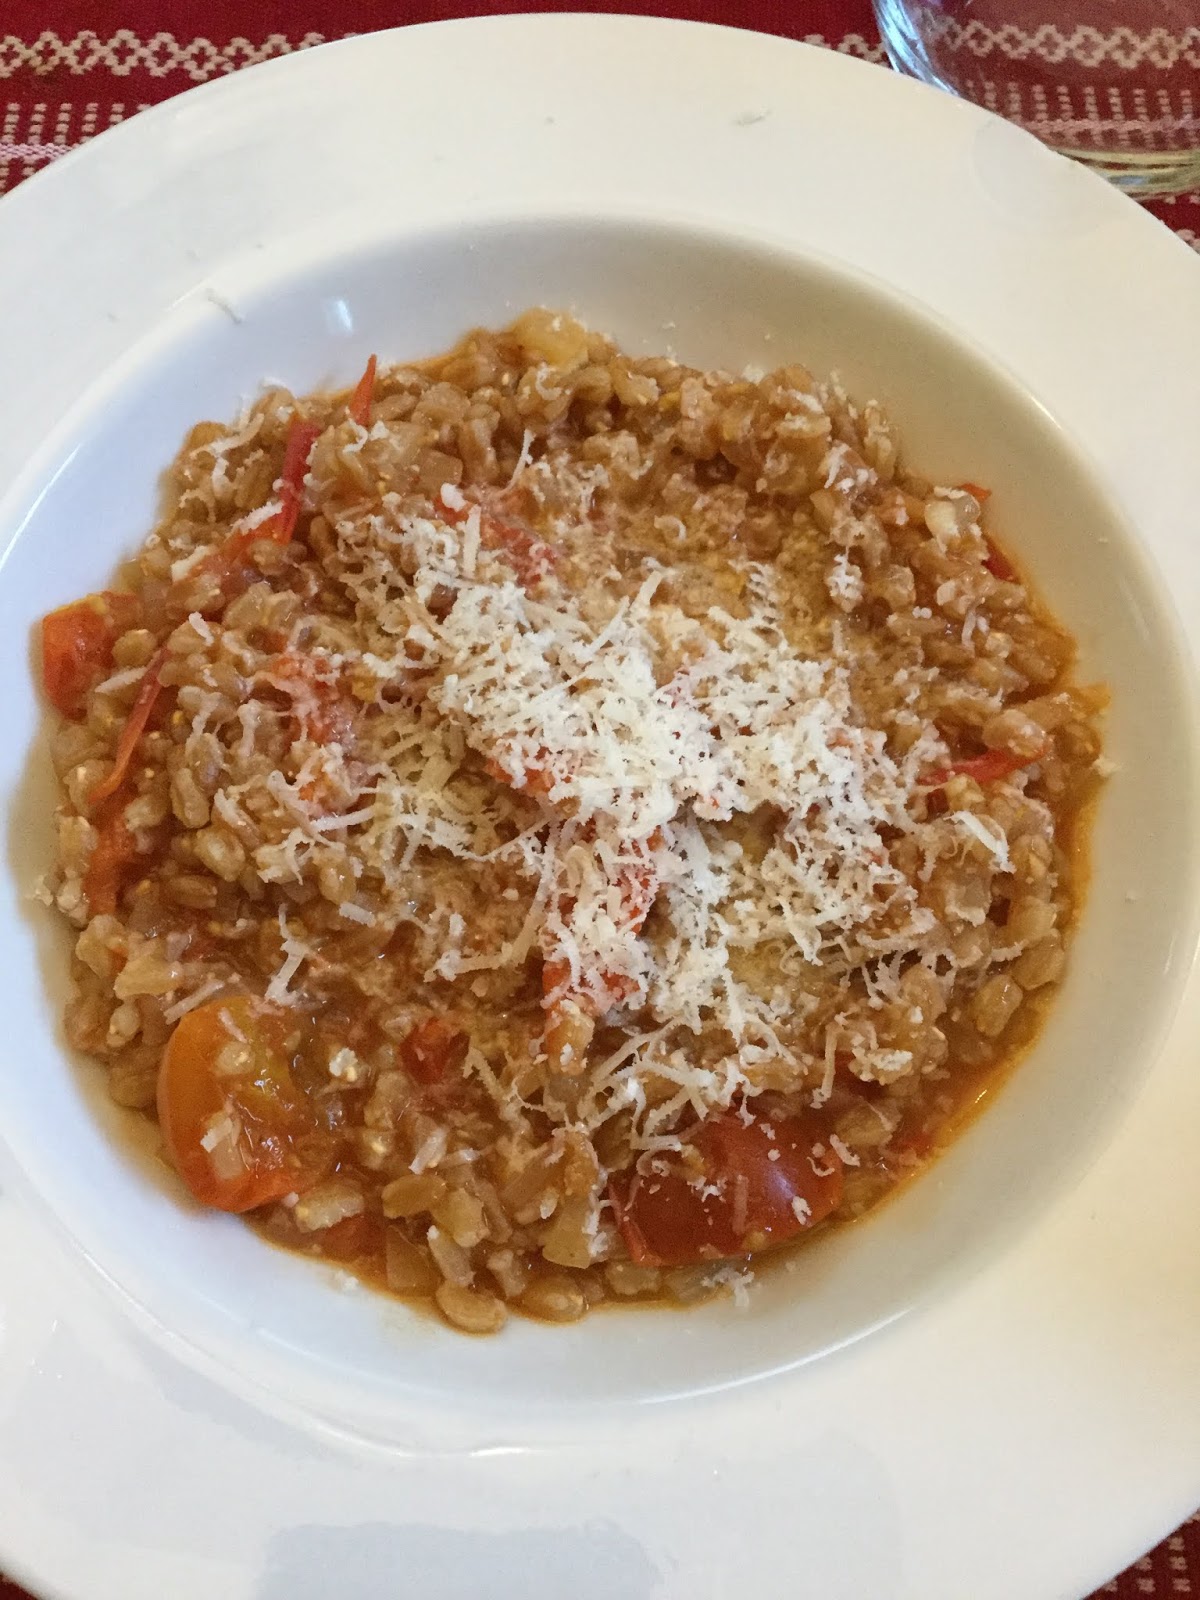
First, we got a bunch of cherry tomatoes to make a batch of Smitten Kitchen's farro (but we forgot to get basil, whoops):


Then we had a glut of cherry tomatoes that started getting a bit old, so we made the bon appetit summer bolognese (We remembered to get more basil for this!). This is one of my favorite pasta dishes. It's DELICIOUS, satiating, fast, only dirties two dishes, and uses fresh cherry tomatoes to make the sauce. It reheats nicely, too.


Prior to that, we'd made the Italian rustic loaf, and the date soup, which used some some mushrooms: 
Rising!
Finished product!
Then, thinking to use up some of our costco mushroom glut, we made the New York Times cooking baked orzo recipe, but forgot to add the mushrooms. The result was still delicious, and it was completely eaten up within 24 hours. It's kind of like a super fast and easy risotto made of giant rice, with creaminess coming from the cheese. A second attempt (with successfully adding mushrooms, and adding less Parmesan) on Saturday worked


We managed to save more of this for leftovers by having snacks in the afternoon, but it's disappearing fast. For people without an NYT cooking subscription, here's the recipe:

Monday, March 23, 2020

Adventures in bread

I'm not quite the over achiever that Linnea is so I only had a 25 pound bag of bread flour that I got at christmas time.

We made pizza before mom and dad left.  I don't have any pictures and will do a post about that later.

Since then, I have made white bread: https://lilluna.com/basic-homemade-bread-recipe/

I did not top it with butter but it was super yummy! I think it might have been slightly under risen.   This is before rising:

Shaped into loaves: 

The split loaf is half cheesy bread.  I put in what felt like a stupid amount of cheese and it barely showed up in the final product - it was yummy though!   (you can see a bit of crunchy cheese that leaked out on the right side of this picture)

I followed her directions and sliced and froze the second loaf and it made some delicious sandwiches for our hike on Sunday.

I also attempted to make breadsticks (https://prettysimplesweet.com/crispy-breadsticks-grissini/).  I wanted them to turn out like the breadsticks from wuolett.  These did not rise enough to be like those so I will keep searching.  I don't have any in in process pictures for these but the amount of oil and butter in the dough made it very stiff and splitty.  The kids said they were delicious though. 


Last up was hamburger buns: https://www.tasteofhome.com/recipes/40-minute-hamburger-buns/


This dough was much easier to work with.  The shape is all wrong.   These were some notes from Hannah: To make burger buns weigh dough to 3 oz, round, place on parchment lined pans with space. Let rise then flatten with your hand. Dont squish super flat but deflate and the diameter should be about the diameter of finished bun, let rise again and then bake. If you want to be fancy spray with egg wash and sprinkle with sesame seeds.
I also forgot to add the salt which was definitely missed.  I also realized this morning that there is a video and they put damp cloth over when they did the 10 minute rest so maybe that would have flattened them out more.  I think I also made them too ball shaped when I made the initial buns. 

Overall -
Loaf bread - A - super tasty and not too hard - would add an egg wash to make it pretty next time
Breadsticks - B - tasty but harder to make and not what I was looking for
Hamburger buns - B- - This is mostly my fault since I forgot to add the salt.

More misadventures in baking to follow!

Monday, March 16, 2020

Quarantine Cooking!

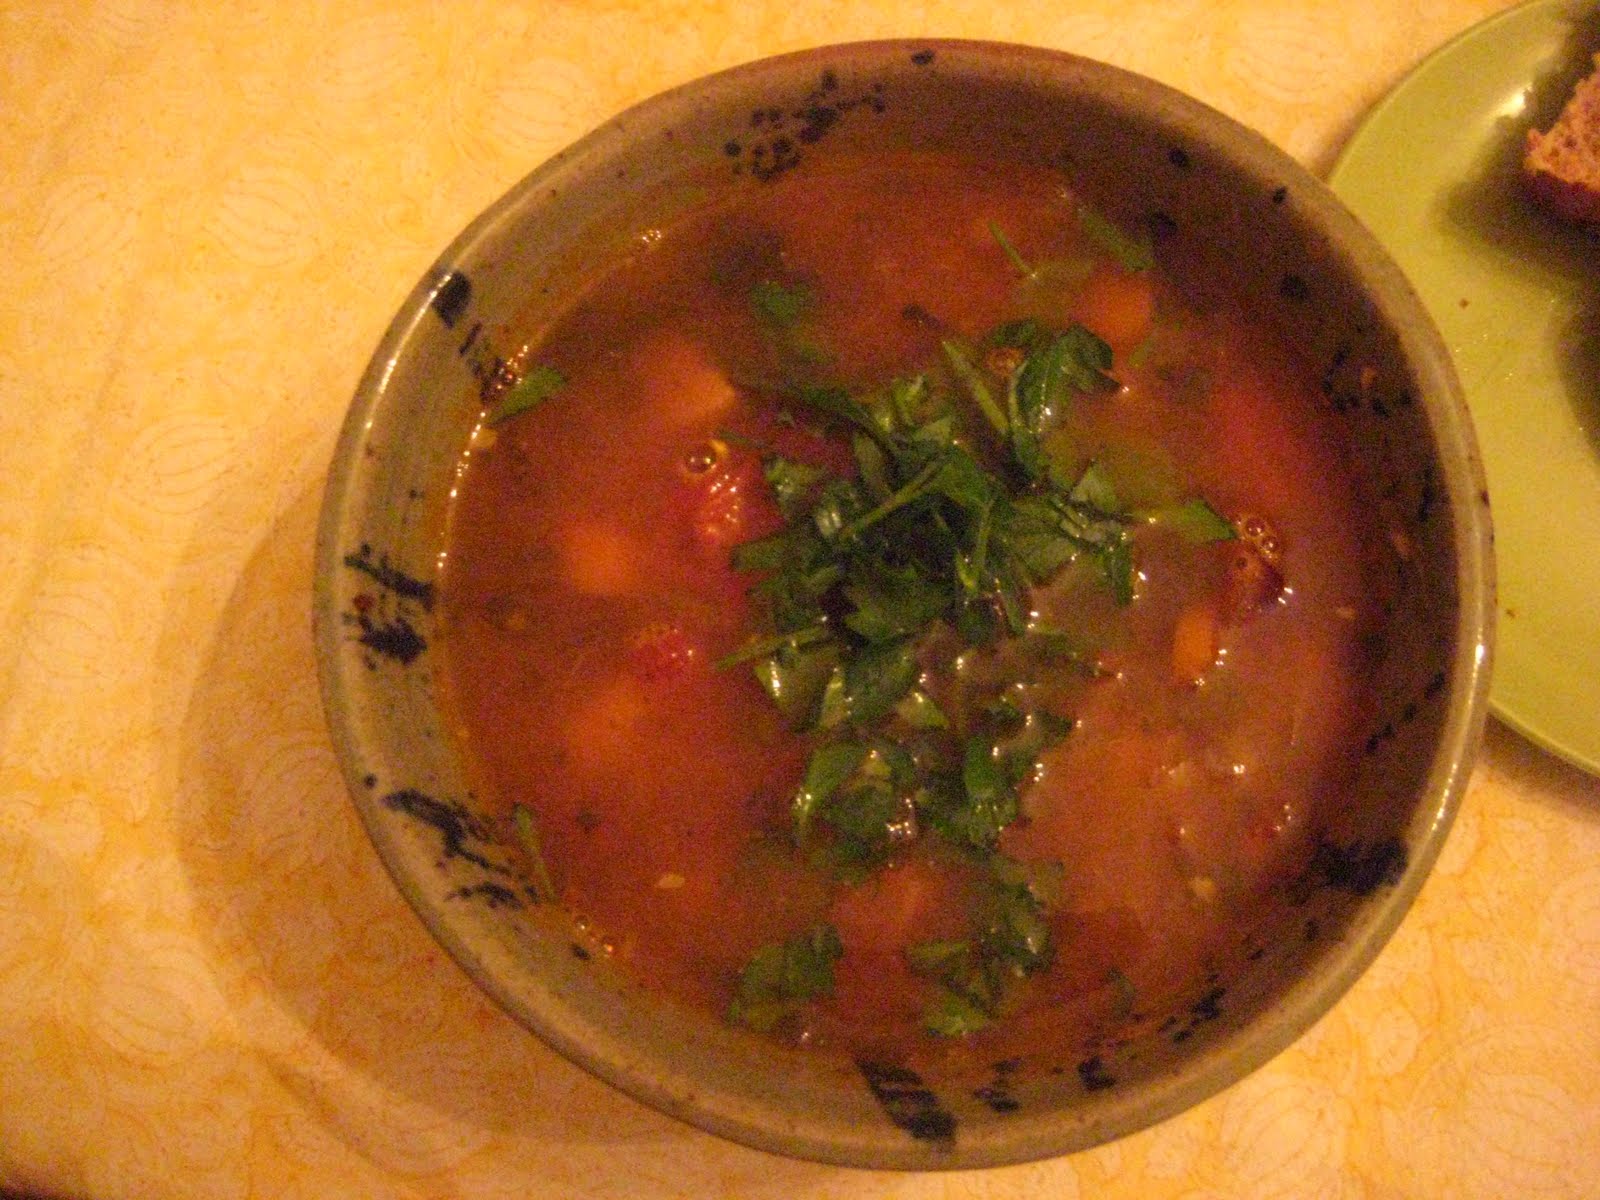
Now that we're all doing our best to be house bound, this seemed like a the perfect time to revive our cooking blog to swap recipes. Last night we made a good, freezable, fridge-cleaning soup that we call date soup! Here's the (very flexible) recipe:

For the protein:
1 lb ground meat (preferably chicken or turkey) (Or no meat! Do beans instead)
Liberal amounts of garlic (like 8 cloves?)
Basil or parsley (dried or fresh is fine)
Salt or garlic salt or onion salt, or a mix of all three!
Pepper
Olive oil
Cut any of the above seasonings, or add others that you like (I'd add fennel seeds, but that's not popular with the wife).

Add meat, crushed garlic, and seasonings to a bowl, and squish together like you're making meatballs or sausage. Heat the olive oil in a soup pot, then add meat, and cook so it ends up in little bits, like you're making a bolognese sauce or taco meat.

For the rest of the soup:

Carrots
Onion
Zucchini
Yellow summer squash
Mushrooms
Spinach
Fresh basil
Omit any of the above vegetables, or add others that you like or need to get out of your fridge.

Cut up your vegetables into spoon-appropriate sized bits. Add the carrots and onions to the protein, stirring until they're a bit cooked, then add:

Canned tomatoes or a can of spaghetti sauce
Chicken or vegetable broth
Bay leaves
Other seasonings (Italian seasoning, etc)

Then add the rest of the vegetables, starting with the summer squashes, waiting a while, then adding mushrooms, waiting a while, and adding spinach and basil right before it's done.

As the soup is cooking, cook noodles (pasta shells are traditional for us) to eat it with, or eat it with bread. (Italian rustic is really good, and here's an easy recipe that's worked well for me. (NOT SO RIDICULOUS OF ME TO HAVE BOUGHT A FIFTY POUND BAG OF BREAD FLOUR, NOW, IS IT, STEVE??))
Parmesan or mozzarella are great on top of this soup!

Sunday, May 20, 2012

Strawberry Season and Getting Ready for Baby McGee

Today was the sort of day to make those darned Mormon lifestyle bloggers jealous, and not just because of P's glass of red wine and our breakfast coffees. Two of our oldest and dearest friends came down for the weekend, and then left on noon at Sunday. Such considerate guests to leave us one whole weekend day to get all the things done that need doing! We are now totally set for newborn and 0-3 month clothes for our littlest bun, and our brand-spanking new gigantic IKEA bookshelf holds her clean clothes admirably well until we can find a new dresser for H to move into.

An adorable thrift store find to round out H's week of finding great deals on baby stuff. Owl long sleeved onesie for a quarter!

 E shows off the first days of the third trimester (28 weeks!) and her amaaaazing pie creation.

    P got an awesome little hibachi grill for his birthday, so we decided to grill sweet corn and chicken sausages for dinner tonight. I made a 'lishy' (H's word, isn't it great?) salad from the spoils from our  first farmer's market of the year, and we ate like royalty.

     This afternoon we drove out to the strawberry patch and brought back a lovely crop of strawberries. Our first treat is Strawberry Pie with a coconut streusel crust.


All recipes from Bittman's How to Cook Everything, Tenth Anniversary Edition

Sweet Tart Crust + Streusel Topping + Fresh Strawberry Pie

Sweet Tart Crust:
11/4 cups flour, plus more for rolling
pinch salt
2 T sugar
1 1/4 sticks frozen or cold unsalted butter, cut into chunks
1 egg yolk
3 T ice water

1. Combine flour, salt, sugar in food processor, and pulse. Add butter all at once, process about 10 seconds, until the mixture is uniform (don't overdo it). Add egg yolk and pulse a few more seconds. Now you'll have small crumbs.
2. Put the mixture in a bowl, add 3 T ice water; mix with your hands until you can form the dough into a ball, adding 1 - 2 T more ice water if needed. Form into a ball, and freeze for 10-15 minutes. (If you cover it in plastic wrap, you can refrigerate for a couple of days, or freeze, well wrapped for a couple of weeks.)
3. Sprinkle counter top with flour, and add pastry ball. I found that kneading the pastry like bread dough to incorporate some of the flour made for a perfect consistency. Roll out into a circle about 2 inches larger than your pie pan.
4. Loosen the dough with a scraper, and drape it gingerly over your rolling pin to transfer into the pie pan or tart shell. Press the dough into all the nooks and crannies in the pan, and cut the edges flush with the pan edge. Refrigerate for 1 hour or freeze for 30 minutes before filling.

Streusel Topping:
1 stick unsalted butter
1 cup brown sugar
1/2 cup shredded coconut (unsweetened, or reduce sugar)
1 T lemon juice
pinch of cinnamon
1/2 cup whole wheat, 1/2 all-purpose flour

1. Cream butter and sugar in the food processor. Add the rest of the ingredients and pulse until  combined and crumbly; but less uniform than a dough.
2. Crumble the mixture over the top of a fruit pie, crisp, quick bread, or muffins.

Strawberry Pie Filling:
5 cups hulled strawberries, whole or halved
1/2 - 1 cup sugar, depending on sweetness of berries
3 T corn starch
pinch salt
1/4 cinnamon
pinch of allspice

1. Heat oven to 450 F. Toss berries with sugar, thickener, salt, and spices. Pile into the chilled pie crust.
2. Bake at 450 for 10 minutes. Remove from oven and add streusel topping. Bake for another 40-50 minutes at reduced heat of 350 F until pie is golden brown. Cool for at least 20 minutes before slicing. 


Saturday, April 28, 2012

Crafty Projects and Amazing Rice

It's once again my favorite time of the year, the time that final exams are done and summer is just beginning. And once again, P has been busy crafting. Here's a nice 45 minute project for a kid's room.
We found inspiration for it on Pinterest, and then did it ourselves!

Art Hanger

Cost: zero dollars + 45 minutes of effort

 Supplies: 2 pieces of wood from drawer pulls from our freecycled Dresser.
                Bicycle Brake Cable
                Screws and Screw Wallmounts
                Screwdriver + Drill
                Masking Tape + Pencil
                Clothespins
1. Drill holes in center of drawer pulls for screws to mount in the wall.
2. Drill a second narrow hole through the diameter of the drawer pull to thread the wire through.
3. Decide where you'd like to mount the art hanger, and test-mount it with masking tape. Mark the ends for the drawer pulls.
4. Drill holes in the wall, add screw wallmounts.
5. Screw drawer pulls into wall.
6. Add wire, threading through the holes in the drawer pulls, tugging to the desired tightness. Trim off any remaining wire.
7. Add clothespins and art!

Here are a couple of other home decoration projects we've been up to as well. We found two giant very firm pillows for the guest room so we can have a cozier movie area. Here, H demonstrates that the pillows are great for a reading nook too!


I've been slowly redecorating our couch and living room, and we finally got all new throw pillow covers for the couch. Now we have two lovely green ones and the birdie pillow cover on our nice grey couch cover.

Finally, I promised amazing rice. Here it is! It doesn't photograph particularly well, so it's just the recipe.

Coconut, Raisin, and Orange Rice
2 T butter
1 onion, finely diced
1 cup white rice, or parboiled brown rice
1 1/4 cups water
 salt
1 tsp popped cumin seeds
1/3 cup shredded coconut
1/4 cup raisins
1/2 tsp cardamom
3 T orange juice

1. Melt 1 T butter over medium heat. Add onion and saute until tender.
2. Stir in the rice and cook 1 minute, stirring continuously, then add water and salt. Raise the heat to high, cover the pan, and bring contents to a boil. Reduce heat to a simmer, cover, and cook for 14-20 minutes.
3. In a skillet over medium heat, melt butter. Pop cumin seeds by roasting a bit. Stir in almond and saute until almonds brown faintly. Add coconut, and cardamom, and cook until coconut faintly browns. Remove from heat.
4. When rice is cooked, gently stir in almond mixture and orange juice. Remove from heat, cover, and let steam for 10-14 minutes.

Sunday, March 18, 2012

Roast Chicken with Herbed Olive Oil

We promised chicken, so here's our first!
We had a small (3 - 3 1/2 lb) organic chicken to roast, and I have to say, this was the *most* delicious roast chicken P's ever made. I don't know if it was the recipe or the bird, but it was delicious! The most important parts, according to P, are flipping the bird from breast side down to breast side up, basting, and reducing the heat midway through cooking.

Roast Chicken with Herb Oil,
from Bittman's How to Cook Everything

1/4 cup olive oil
2 tsp pestled rosemary and a bit of thyme
salt and pepper
1 whole chicken (3-4 lbs)
1/2 cup water, plus more if needed

1) Heat oven to 450. Mix herbs into olive oil. With your fingers, loosen the skin of the chicken wherever you can and massage oil under skin. Put a bit into the chicken cavity, and remaining on outside of the skin. Sprinkle with salt and pepper.
2) Put 2-3 T butter in a cast-iron skillet. Melt butter and add water and 1 smashed garlic clove (if desired). Put chicken, breast side down, in the cast iron pan. Roast for 20 minutes, spooning some of the butter mixture up over it, then flip bird over onto its wings and thighs. Baste again, then after 10 minutes; at this point, the breast should be browning. Turn heat down to 325, baste again, and roast until the thickest part of the thigh is at least 155-165.
3) when the bird is roasted, transfer to a platter and rest at least 5 minutes before carving.

We served our chicken with whole wheat bread, and truly wonderful carrots. This recipe is sooo simple, and so delicious. Even H ate 1/3 of it, which I'm certain is a new record for volume of vegetables consumed at one meal. Between the chicken breast and the carrots, she really feasted, and so did her Big Baby, who sat in H's high chair and got fed alternate bites.

Moroccan-Style Carrots,
modified from the Gourmet Cookbook, edited by Ruth Reichl

1/2 lb baby carrots, cut into thirds if large
garlic powder, a generous sprinkle
1 T olive oil
a small sprinkle of cinnamon
1/2 tsp cumin seeds
1 tsp turbinado sugar (a spoonful of sugar makes the veg-tables go down in the most delightful way!)
a healthy squirt of lemon juice
salt and pepper

Steam carrots in the microwave, covered with some water for 8 minutes on high (in our microwave).
Heat oil with spices, garlic powder, cinnamon, cumin seeds, and sugar for 2-3 minutes (or more) until spices are lightly toasted and it smells delicious. Stir in carrots and steaming water and cook, until carrots are well coated, about 2 minutes. Stir in lemon juice, and salt and pepper.

Tuesday, January 31, 2012

A proposal, and a winter's dinner


Now that it's the depths of winter in MN, and that winter is on the way out in RVA, we propose an idea. We have Bittman's How to Cook Everything and it is just chock full of delicious chicken recipes. So, we here in RVA think it would be fun to try one new chicken dish every week or two and post about it. Are you all game?
Our first post will be a mock-chicken salad and cream of pea soup with avacado.


This tofu salad is a great favorite at our house, and it doesn't contain any noxious onions or garlic that must be avoided by E at this juncture. It does contain delicious curry powder, raisins, and carrots.

1/2 lb firm tofu
3 T mayonnaise
1 tsp curry powder
1 rib celery, run through a mandoline
1 carrot, run through a mandoline
1 large hand full of raisins
salt and pepper

1. Wrap the tofu block in a CLEAN cotton/linen kitchen towel and gently wring much of the moisture out of the tofu over the sink (really, a clean one. This will not be cooked). Drop tofu into bowl and crumble into course bread crumb size.
2. Stir in all remaining ingredients and chill at least 1 hour, covered to let flavors develop.

We made a green soup to go with our white and orange sandwich spread, and it turned out deliciously.


Cream of Pea and Avacado Soup

3-4 celery ribs, chopped finely
1 T butter
3-4 cups of chicken broth
3 cups of frozen peas
1 tsp dried dill
salt to taste (check it before salting, packaged broth is SUPER salty)
1/4 (or more) avacado
1/2 -1 cup whole milk

Soup is pretty forgiving, but here's how we made it.
1. Saute the celery in the butter for c. 10 minutes.
2. Add the chicken broth, and taste for saltiness. Bring to a full boil.
3. Add frozen peas, continue to boil on lower heat for 5 minutes. Add dill.
4. Take off the heat and add avacado and puree until smooth. Stir in milk to lighten the color.

Monday, January 23, 2012

fast father-daughter food

This evening, Dad and I were left on our own for dinner, only instructed to use up the shrimp, eat some asparagus, and to finish the spinach. We noticed an open box of chicken broth in the fridge, and decided to make soup. We boiled the broth and added some spaghetti, then tossed in the shrimp, asparagus, and spinach as the pasta got close to done. We only used one pot for all our cooking, and the cooking process was fast and easy. The final result was tasty, but could have used a bit more seasoning.

Picture!

Sunday, January 1, 2012

Happy New Year!

Yesterday we updated our New Year's Eve tradition by making out own pizza instead of ordering out. Mom took care of the dough in her new Cuisinart while I prepared olives, onions, sausage, cheese, and other toppings. Then, while the dough rose, I made some olivata using this recipe, and it turned out pretty good.

Mom made a large pizza with tomato sauce, mozzarella, sausage, basil, spinach, onions, and red pepper. I made a smaller one with olives but sans sausage and red pepper. Steve made himself a small sausage pizza, and I made a dessert pizza with strawberry jam, mozzarella, and a tiny bit of experimental olivata on one corner. It was surprisingly good. I think we might have a new tradition for New Year's Eve.

Saturday, November 26, 2011

Tunisian Turkey Stew (or Turkey Triangles)


Happy Thanksgiving everyone! I hope fun was had by all in AZ! We had a great meal with E's family in RVA. Our turkey turned out truly fantastically, but we ended up with a great big bird


(13 pounds for 4 adults). The turkey was amazing, and the Bean thought it was the best thing ever with a little bit of cranberry "jelly".

Now that we've feasted, we're trying to enjoy the rest of our turkey without eating sandwiches, because those are just boring day in and day out. We've already made stock, and we saved most of one breast in one piece for another big meal. For the rest of it, we're thinking of clever ideas. Tonight we made soup. I modified one of my favorite soup recipes by throwing in turkey and a bunch of vegetables. It was a tonic to warm the belly and cure what ails you.


Tunisian Turkey Stew
2 T butter
1 cup yellow split peas (or lentils)
1 onion, finely diced
1 cup carrot pennies
1 T curry powder
1 inch ginger, chopped coarsely
1 tsp cumin powder
1 tsp cumin seeds
2 tsp salt
2 dried chiles, whole
1 cinnamon stick
4 cups turkey stock
1 14 oz can chopped tomatoes
4 - 6 cups cubed turkey (I just cubed a good sized mixture of dark and light)
1 cup frozen spinach
Chopped fresh parsley (optional)

1. In a soup pot on medium heat, saute onions and carrots with spices (save cinnamon stick) in butter for 5-8 minutes, until onions are soft.
2. In a second sauce pot, cook split peas or lentils in 2 cups of water, with the cinnamon stick. Bring to a boil, and partially cover. cook at a low simmer for about 30 minutes. Lentils are very foamy, so watch out when you first reach a boil that you don't boil the pot over.
3. In the soup pot, add tomatoes, turkey broth, turkey cubes, and spinach. Bring to a boil. Reduce heat to a simmer and cook for 15 minutes.
4. Add the lentils and any remaining cooking water, and heat all together for 5 - 20 minutes more.

Sunday, October 23, 2011

Ginger Drops for the Bean (how we made Lebkuchen by accident)

The Bean requested gingerbread cookies, and we've been sick for the past week, so baking cookies seemed like a nice pick-me up. H wanted to eat cookies NOW so we used a drop cookie recipe. I made all sorts of substitutions, but I think the final product might be even better than the original. The batter looked like cake batter, and the cookies are like little cakes as well, or like whoopie pie cookies, but spicy and delicious. You can't even taste the cocoa, but since we were missing Molasses, I substituted honey + 2 T cocoa powder for the rich molasses color. Once the cookies cooled all the way, the spices have really gotten more intense, and P and I realized we've made homemade Lebkuchen! H ate three or four as soon as they came out of the oven.


Beanie's Honey-Ginger Drops (Lebkuchen)
2 cups flour
2 T cocoa powder
1 tsp baking soda
1 tsp grated lemon zest
1/2 tsp salt
1/2 tsp ground ginger
1/2 -1 tsp ground cinnamon
1/4 tsp Chinese five-spice powder
1/2 cup sugar
1/4 cup butter
1/2 cup honey
1/2 cup hot water
1 large egg

Preheat oven to 375. Lightly grease three baking sheets.

Combine dry ingredients until well mixed.

In a large bowl, beat butter, sugar, honey, water, and egg until creamy. Add flour mixture, and stir until just blended. Let the batter stand 5 minutes before dropping by rounded teaspoonfuls onto baking sheets, spacing drops 2 inches apart (Really do, you can still fit 1 dozen on one sheet, and they are spready).

Bake for 8 - 12 minutes. Reverse baking sheets during baking. With wide turner, immediately transfer cookies to wire racks.

Rumor has it, you're supposed to store them in covered container, separated by wax paper. We'll see if mine are a giant cookie mass tomorrow.

Sunday, September 25, 2011

Simple September Suppers

This September is really and truly devilishly busy. H started preschool, and E has two major deadlines in September, an out of state conference, plus a test and a batch of papers to grade. So September has been all about easy meals here. We did manage to make 8 pints of canned tomatoes at the very beginning of the month that we've stashed for the depths of winter when we'd love the taste of a good tomato.

Tonight we had one of the easiest dinners we know: Pasta Puttanesca with salad with herbs, cucumbers, beats, and radishes.

Rotini alla Puttanesca
1 can crushed tomatoes (28 oz)
3 T olive oil
3 large garlic cloves, sliced and halved
1 small bell pepper, diced
3 T parsley leaves, chopped
1/2 tsp dried oregano
3 anchovy fillets, or a hearty T of anchovy paste
3 T strong black olives, halved and pitted
1 T capers
salt to taste
1 lb rotini

Combine oil, garlic, bell pepper, parsley, oregano and saute until peppers are soft. Add anchovies and stir. Add chopped tomatoes and olives, red pepper flakes, and capers. Simmer for 20 minutes. Add salt to taste.
Cook the pasta. When it's done, transfer still dripping into serving bowl and toss with puttanesca sauce.

No pictures of the pasta, but here are a couple of jars of the tomatoes we canned at the beginning of the month.


And, in case you wondered what on earth anchovy paste might be, here's a handy-dandy illustration. It comes in an awesome tube like old-fashioned toothpaste, and you can find it by the tuna, sardines, and other fishy things in the grocery store.

Pressure Cookers and Polenta

Mom has been encouraging me to get a pressure cooker for quite a while. I had an irrational dislike for pots that you have to lock shut and then you don't know when it's safe to open and the consequences for opening too soon are that boiling hot food is sprayed all over the kitchen. Theresa sent me a link to an electric pressure cooker where there are built in safety interlocks so you CAN'T open it when it would spray boiling hot food all over the kitchen so I got one. The children were very pleased with the box that my new purchase arrived in.

It only lasted for about 3 days as a toy before it got destroyed.

This is what the pressure cooker looks like:


My first attempt was to make some creamy polenta which I quite like but it's a pain because you have to sit there and stir and stir if you don't want lumps.
Theresa had sent me a recipe that she got from a friend and I modified it slightly.

Turkey sausage
Onions
Corn (had some left over ears so I cut the kernels off but you could use frozen or canned too)
1 1/2 c polenta
6 c of chicken broth (I used 3 cans plus water to make up the difference)

Saute the onions and sausage in the pressure cooker (there is a couple of settings that allow for browning things in the pot, I used the wrong one so I didn't get good color)

Remove half the mixture to top with later (I skipped this)
Add the broth and the corn.
Bring to a boil
Add the polenta slowly while stirring
Bring back to a boil


Cook under high pressure for 7 minutes (there is a timer, you just pick the type of pressure you want and the time.
Open the fast pressure release valve.

And you have polenta!


I thought it was quite tasty, the texture was just PERFECT. No lumps at all. Patrick said it was too bland and I can understand that because I don't think the sausage and corn and onions were enough of a contrast. I'd make this again as a side dish for pasta sauce or something I think.
Alex tried it. Elizabeth declared that it looked "icky" and almost made herself throw up when we made her take the courtesy bite. (I think she gets that from the McKinney side :) )

More Dessert (this one from Erika)

There is a new website called Pintrest where you can make pin boards of things that you like. You can sign up to follow friends and then you can see what they like too. Erika pinned a super yummy looking banana cake and I had 3 bananas that weren't getting eaten on the counter. I found the recipe here: recipe

We happened to have almost everything. I won't use shortening so I used butter instead. I didn't feel like buying a whole thing of sour cream so I used a container of fat free greek yogurt and then some dregs of a low fat sour cream that we already had plus a little extra banana. I also don't like walnuts so I used pecans and just because I think they go well, I put about 1/3 to 1/2 c of mini chocolate chips.


Ingredients

  • 1/3 cup shortening
  • 1 1/4 cups sugar
  • 2 eggs
  • 1 teaspoon vanilla extract
  • 1 1/4 cups mashed ripe bananas
  • 2 cups all-purpose flour
  • 1 1/4 teaspoons baking powder
  • 1 teaspoon baking soda
  • 1/2 teaspoon salt
  • 1 cup sour cream
  • 3/4 cup chopped walnuts
  • confectioners' sugar

Directions

  1. In a mixing bowl, cream the shortening and sugar. Add the eggs, one at a time, beating well after each addition. Blend in vanilla. Add bananas and mix well. Combine flour, baking powder, baking soda and salt; add to the creamed mixture alternately with sour cream, stirring just until combined. Stir in walnuts. Pour into a greased and floured 10-in. fluted tube pan. Bake at 350 degrees F for 50 minutes or until cake tests done. Cool 10 minutes in pan before removing to a wire rack to cool completely. Dust with confectioners' sugar before serving.
I made this during naptime so I had no helpers but here are some gratuitous cute pictures from today. :)

Writing a letter

Best use for an oversized shower ever!

Watching Wonder Pets!

Sunday, September 18, 2011

September 18

Welcome back to the blog! We all did have a busy August, didn't we? We have gottent o the farmer's market two weekends in a row. With last weeks haul I made the corn chowder for Christmas Eve, some wonderful chicken chili and french casserole.


Eggplant Lasagne Inspired by the Farmers Market

At the Farmer's market we bought:
Wonderful fresh perfect clean Spinach (About 3/4 cup after sauteing olive oil)
Tomatoes (I used about 10 of them)
Onions ( I used 2 in the tomato sauce and about one fairly small one in the cannellini beans)
Eggplant ( I used about 1 1/2 medium large)
Basil (I used about 1/4 cup, measured after it was chopped)

We stopped at the coop on the way home and bought
Garlic (I used about 1/2 of a large head)
Cannellini Beans ( I cooked 2 cups but didn't use all of them)

I wasn't happy with the mushrooms at the coop so we stopped at Lunds and bought a couple of boxes

The Beans
I started by preparing the beans. I washed them and very slowly brought them to a boil and then let them soak for about three hours.
When I was really ready to cook, I drained the beans and sauteed an onion in the bottom of the pressure cooker. I added 3 cups of homemade chicken broth (just use water or vegetable broth if you want a real vegetarian dish.) from the freezer and the drained beans and very slowly brought the pressure up. I didn't even let it start dancing when I took it off and let it set until the pressure went down all by itself. I have about a cup a half of beans and liquid left now that I have finished the dish. The beans and the cooking liquid are delicious. I'm not sure if we will use them for a salad or rewarm them and eat them straight up tomorrow.

The Tomato Sauce
I sauteed 2 chopped onions and 4-5 cloves of minced garlic in some lovely Greek olive oil. I blanched (dipped in boiling water for about 30 seconds) peeled, trimmed and chopped the tomatoes.and added them to the onions and garlic
I added chopped basil, a bay leaf and a teaspoon or so of thyme and about a teaspoon each of brown and white sugar and 2-3 cloves of pressed garlic. I cooked this down to about half and added 6 oz of tomato paste . This was really great all alone. I a may make more to use for spaghetti.

The Mushrooms
washed, sliced and sauteed in olive oil

The Spinach
washed, trimmed from the stems and sauteed in olive oil

Eggplant
I cut it into about 3/8 inch sliced and brushed both sides with Olive oil. It turned about that after almost an hour in the oven at 325 the eggplant still wasn't quite done. So either pre-bake the eggplant for a half hour or so or bake the whole business covered for an hour and ten minutes and then add the cheese and bake it another 20 minutes or so.

Putting it together

In a couple of Steve's square casseroles I layered things. I had about 3 layers of tomato, 2 layers each of beans and sliced eggplant and one layer each of spinach and mushrooms. The third smaller casserole was quite shallow and I was running out of stuff so there was just one layer of each thing except a couple of skimpy layers of tomato. I topped it with thinly sliced mozzarella cheese and started out by baking it at 325 for slightly under one hour. It turned about that after almost an hour in the oven at 325 the eggplant still wasn't quite done. I baked it for another half hour at 350 and then the cheese was over-baked. So either pre-bake the eggplant for a half hour or so or bake the whole business covered for an hour and ten minutes and then add the cheese and bake it another 20 minutes or so.

We all liked it! Linnea cooks tomorrow.


Wednesday, July 27, 2011

Two delicious ways to eat eggplant without an oven


No this isn't a fashion blog all of a sudden. When I came home from work on Monday, I discovered that H had organized half of my shoes all in a pretty row. She LOVES my shoes, and she treats them right too!


The first way to eat eggplant without turning on the oven:
This week I made one of my favorite Greek vegetable dishes, and if I do say so myself, it was truly delicious. So tasty in fact that we couldn't get any pictures of it! We bought a gigantic globe of an eggplant as well as 2 pints of green beans from our CSA, so I decided to make a Greek λαδερά (literally oily, but typically just stove-cooked vegetables) dish out of them. As long as you're willing to sit near the kitchen and stir every 15 minutes or so for an hour and a half, this dish is virtually effortless.

Eggplant and Green Bean Giahni (φασολάκια γιαχνί με μελιτζάνες)
This makes 2 quarts or so.
1/4 - 1/2 cup olive oil
1 large onion, finely diced
3-4 cloves garlic, minced
2 pints fresh green beans, tips trimmed and halved
1 large or two medium eggplant, cubed to 1-2 inch pieces
1 large green pepper, sliced
28 oz can diced tomatoes
3 dried hot peppers
salt and pepper to taste
water, if needed (we used 3/4 cups)

This recipe hardly needs directions, it's so straightforward. What you do need is a good large stockpot or dutch oven.

Saute onions in 1/4 oil until they turn caramel colored. Add green pepper, eggplant, and green beans. Saute for a couple of minutes. Add tomatoes and hot peppers, salt, and water to submerge the veggies if it bothers you that they aren't all in liquid at the beginning of cooking.
Bring to a boil, then reduce heat to low, cover, and simmer for 1 1/2 hours.

This dish is perfect with crusty bread, a thick slice of feta cheese, and a glass of wine.

The Second way to eat eggplant without turning on the oven:
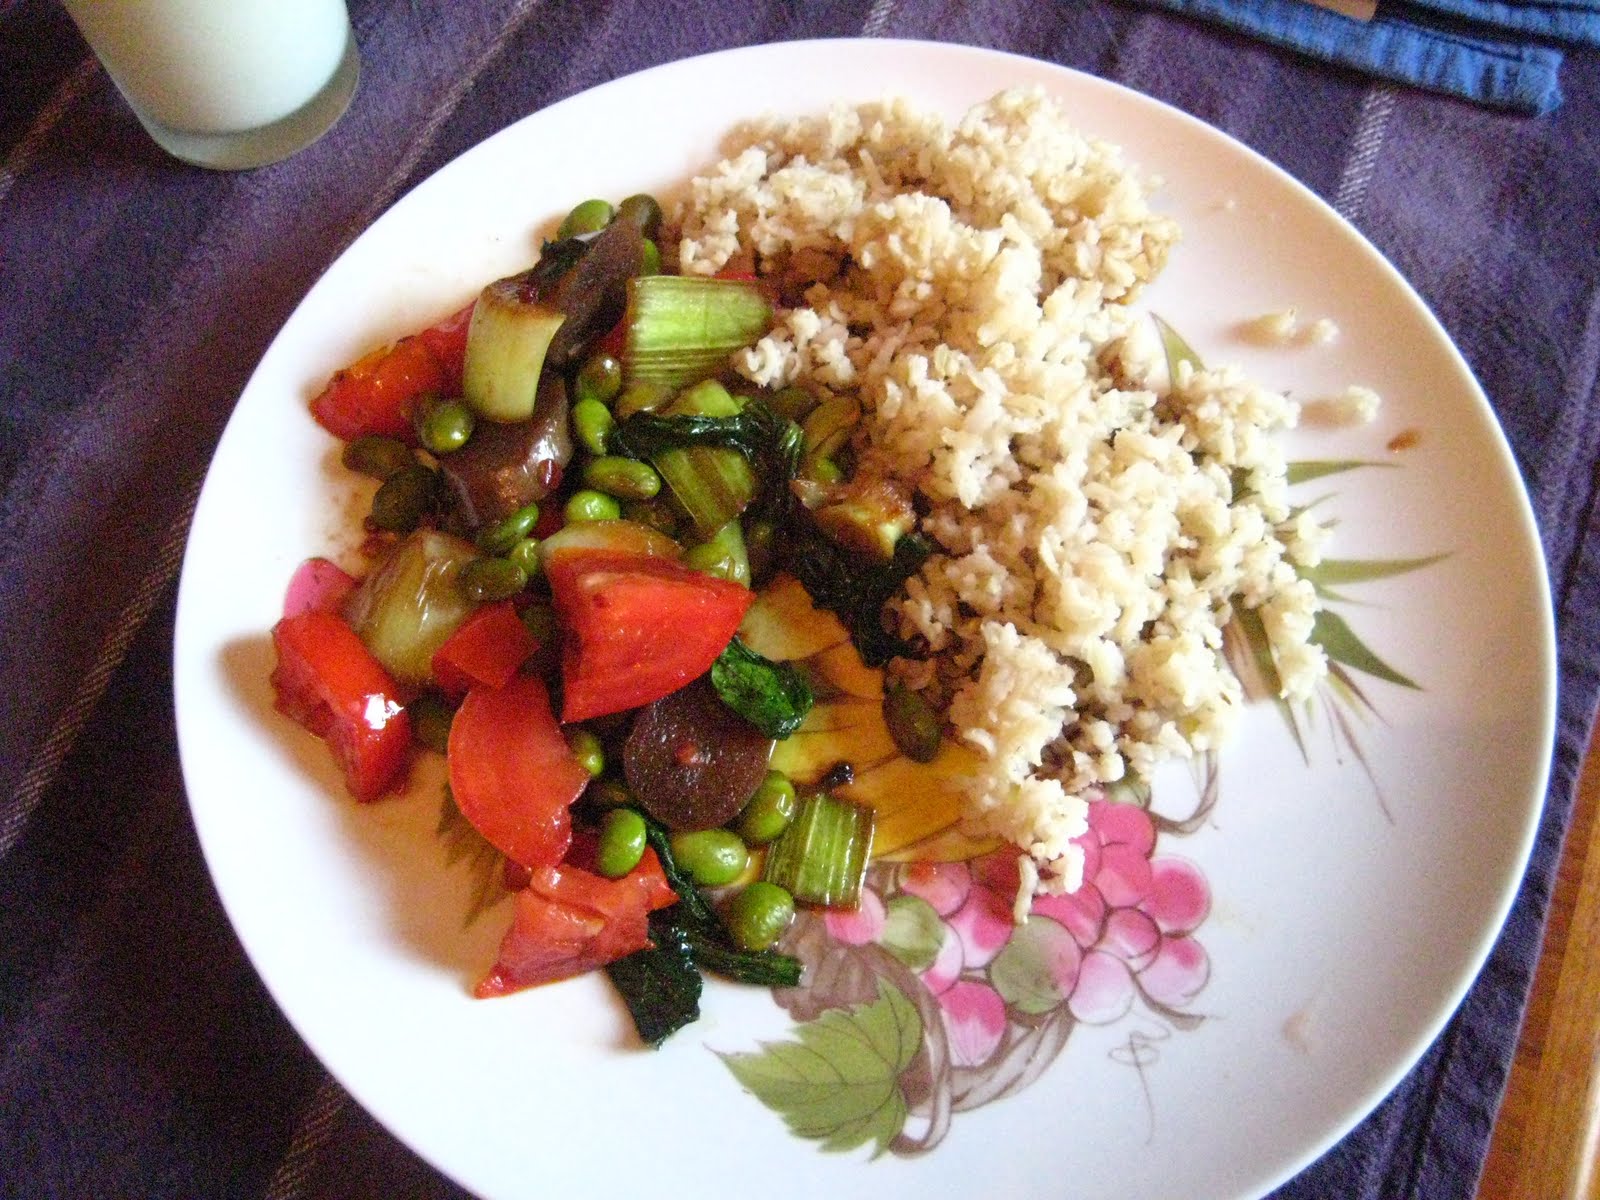
We love eggplant around here, so we've stocked up on not only the large globe eggplants, but also on the long and slender Chinese eggplants. Tonight I made a quick stir-fry with eggplant, edamame, tomatoes, and bok choy.

Eggplant, Bok Choy and Edamame
Serves 3-4
2 cups edamame
2 heads of bok choy, greens and white stalk separated and chopped
3 cloves garlic
1 Chinese eggplant, sliced
Olive oil or vegetable oil for stirfry
2 smallish tomatoes, quartered or smaller
soy sauce
maple syrup
Chili paste with garlic
sesame oil

Stirfry the white stalk of the bok choy until it loses its rawness. Add garlic and bok choy greens, edamame and eggplant.
Mix up the sauce, and reduce the heat on the stirfry to medium low. Add the sauce and cook for 3-5 minutes. In the last minute, toss in the tomato.
We loved this dish with brown rice.


And a bonus, the kid version, edamame, bok choy, and brown rice without the spicy sauce